You dream of the wasteland. You hear your name in fire. Songs written in blood.
The Orcs are calling you home.
Orc Basics
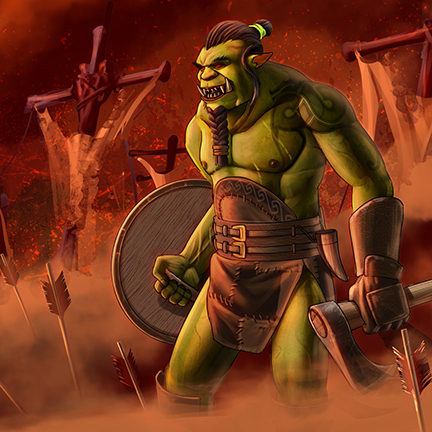
The Orcs are a proud, fast, warrior race, excelling in melee combat and buffing units. If you want to smash Zombie face with sheer, overwhelming force, the Orcs are the race for you. Let’s have a look at their defining characteristics; we’ll go into more detail a little later.
- Brawler Nation: Orc units and heroes typically have very good Strength-to-Gold ratios, making them exceptional melee combatants.
- Shock and Awe: Orcs have access to three of the fastest usable melee units in the game, as well as a buff that can keep pace!
- Compulsion is for Cowards: The Orcs have zero crowd control ability. None. Here in the desert, we care about killing Zombies, not moving them around.
- Gold Before Glory: Orcish units and heroes are very expensive, and their towns generate only middling Gold. You’ll want to “persuade” some Goblins or Dwarves to join the cause in order to fund your war effort.
- Even in Death: Blighted Orc settlements represent more Zombie strength than any other race, with a fallen Fortress producing up to 9100 base strength for the undead. Luckily, the Orcs are also well suited to handle this scenario.
Bread and Butter
First things first; let’s look at the Orcs’ core fighting units. Starting, of course, with their basic unit trained at settlements:
Core Units
50 Orcish Swords
These bad boys are the core of your biggest armies, because:
- They are downright cheap compared to your other options (seriously).
- There are fifty of them (see the section on Buffs).
Barring a compelling reason to do otherwise, there should even be several sets of these in your deck! Not because you might want to drop them at settlements for instant power, though you might, but because putting them in your deck allows you to drop them at Banners, reinforcing your armies with fifty fresh warriors while on the move.
- Cost: 300 Gold
- Total Strength: 600
- Speed: 4 Hours/League by Road
- Strength Per Gold: 2.0
- Type: Orc Warrior
25 Wolfriders
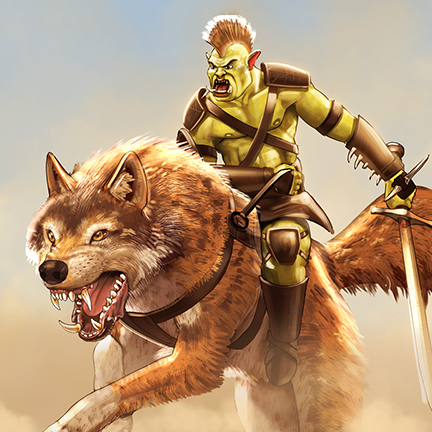
These outriders are great at clearing graves or racing ahead to defend frontier towns. They are on the expensive side, but this much power and speed is absolutely worth it.
- Cost: 400 Gold
- Total Strength: 600
- Speed: 3 Hours/League by Road
- Strength Per Gold: 1.5
- Type: Orc Wolf Warrior
10 Wolf Chariots
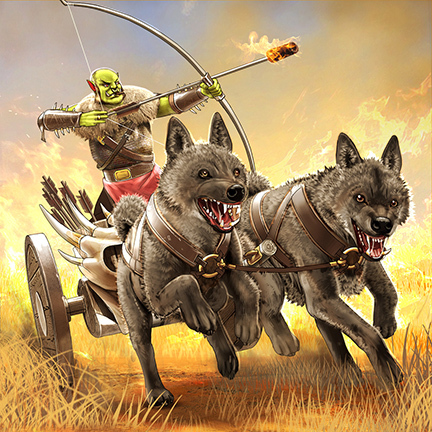
The little brothers of the Wolfriders are more vulnerable in melee, but come with a mana-free ranged attack at the start of every combat that makes them phenomenal graveyard-clearing machines with far less micromanagement than other races require.
- Cost: 225 Gold
- Total Strength: 300
- Speed: 3 Hours/League by Road
- Ability: Chariot Charge: Before any combat, the enemy suffers a ranged attack with X*15 Strength (150).
- Strength Per Gold: 1.3
- Type: Orc Wolf Warrior
Buffs, Buffs, and More Buffs
The Orcs have more passive army-buffing Heroes than any other race, with a full eight buff cards available. These “Generals” mostly don’t stack with themselves, but they do stack with each other, so it’s not uncommon for each unit in an Orcish army to have +10 Strength or more. As a result, the best units for the core of Orcish armies are plain old Orcish Swords, simply because there are so many of them to empower! The first Generals to look at are the unconditional ones: these are good anytime, anywhere.
Unconditionally Buff
Desert Maiden

The iconic Orc Buff, she provides all your Orcs with +6 Strength. This represents a 300-Strength boost on just a single unit of Orcish Swords. Add that to the fact that she’s one of the cheapest heroes available, and you can immediately see why she should always be a part of every Orcish army.
- Cost: 125 Gold
- Total Strength: 180
- Speed: 4 Hours/League by Road
- Ability: Orc Ferocity: All Orcs in her Army gain +6 Strength.
Jolly Tavern Keeper
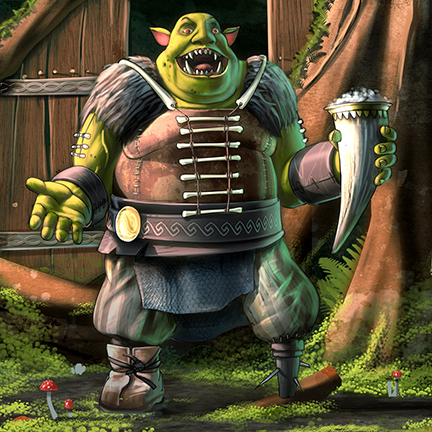
At first glance, the Jolly Tavern Keeper seems inferior to the Desert Maiden, but there are three important facts to consider:
- He buffs all units in his army, not just Orcs. So if you’re stuck with Humans or some other inferior combatants in your army, the Tavern Keeper will do his best to help them keep up with your real warriors.
- He stacks with the Desert Maiden, so you don’t have to choose one or the other! You can, and should, put more than one General in any army big enough to be worth mentioning!
- He gives free beer to everyone in his army.
Free beer is the great equalizer.
- Cost: 250 Gold
- Total Strength: 60
- Speed: 4 Hours/League by Road
- Ability: Ale For All: All units in his army gain +4 Strength.
Butcher
The Butcher is the underage cousin of the Tavern Keeper. He gives out a smaller bonus, but is a stronger hero on his own, making him ideal for leading smaller groups of non-Orcish “warriors” into battle. Of course, he’s also great as yet another +2 Strength on all your Orcish Swords. The Jolly Tavern Keeper outstrips the Butcher’s strength once the army size gets above 90, but a Butcher remains a welcome addition to any army.
- Cost: 250 Gold
- Total Strength: 240
- Speed: 4 Hours/League by Road
- Ability: Bacon For All: All units in his army gain +2 Strength.
Wolfpup Handler
How great would it be if there was a General that could keep up with your Wolfriders and Chariots? The answer is: it’s really great. The Wolfpup Handler is the cheapest hero in your entire civilization, moves at three hours per league, and buffs your other fast units. She’s even a Lurker, so you can drop her immediately on the troops she buffs, and playing a bunch at game start makes for the most efficient expansion of any race! Are you kidding me?!
Use her early on to claim Mana Pools and settlements, then meet up with your Wolves to push their melee strength over the top.
- Cost: 50 Gold
- Total Strength: 24
- Speed: 3 Hours/League by Road
- Ability: Heart of the Wolf: All Wolves in her army gain +6 Strength.
Scarface Lord
Scarface isn’t a General in the normal sense, as he doesn’t provide a passive buff. Instead, he has an ability that can be even better if you have the Mana to make use of it, and why wouldn’t you? Do you have a better use for your Mana than making your armies stronger? I thought not.
Every twelve hours, the Scarface Lord can give a single Unit +1 Combat Experience for eight Mana. This doesn’t seem like much until you think about the long term. Each level of Combat Experience gives a permanent +1 buff to each individual in the unit. What’s more, if you merge a less experienced group into a more experienced one, they all get the benefit of the increased Combat Experience. Finally, the twelve hour cooldown and cost of eight Mana mean that you can use his ability twice each day with only a single Mana pool. That’s like paying 16 Mana to put another Butcher in your army every day.
- Cost: 175 Gold
- Total Strength: 180
- Speed: 4 Hours/League by Road
- Ability: Battle Ready: Every 12 Hours, the Scarface Lord can give a unit in the same location +1 Combat Experience. Costs 8 Mana.
Other Buffs
Yes, it’s true! The Orcs have yet more combat buffs available to them. These are temporary or situational buffs that can turn specific close fights into outright massacres when used properly.
Situational Improvements
- Vicious Sergeant gives all units in his army +3 Strength in Deserts, and comes with 240 Strength himself. Need to fight some Zombie Orcs on their native terrain because compulsion is for wimps? This guy can help even the odds.
- Outcast Warchief gives all units in his army +4 Strength in Forests or Swamps, and is also 240 Strength himself. Not even Immortal Trolls can stand against his army!
- The Blood Shaman can temporarily give all Orcs (& Gobs & Trolls) within 4 Leagues +6 Strength, while reducing the Strength all Humans, Elves, and Dwarves in the area by the same amount! Be careful, because this affects not only your units, but also those of your allies and any Zombies in range, so careful positioning is critical when making use of his Blood Moon ability. But if you find yourself in a position where you can affect both your own Orcish army and a horde of unaligned Zombies, twelve Mana pretty much buys you a free, flawless victory.
Rare and Specialized Troops
No matter how unstoppable your armies are, sometimes it’s more expedient to get something done with spellcasting. Other times, you simply don’t have the right resources to get everything done. That’s where these specialists come in.
Specialist Troops
Shaman Priestess

The Priestess hold four spots in the default Orc deck, and much of the time that’s plenty. She has the unique ability to burn graveyards from afar, making her a powerful asset near graveyards that are too well-defended or too inconvenient to march to. However, the ability costs a whopping twelve Mana, so if you’re using her frequently, you’re not going to be casting much else unless you have an inordinate number of Mana Pools under your control.
In rare situations, the Priestess can be used to convert Mana into Valour. In general, this isn’t a great idea, but it can be very helpful in a pinch, when you’re desperate for more Valour and your army isn’t quite strong enough to win any nearby battles.
- Find the Zombie group that you can most nearly kill with your army. The closer the armies are in Strength, the better, because you’ll inflict far fewer casualties if you’re badly outmatched.
- Position a Shaman Priestess within range of where the battle will take place.
- Send your army into a battle, knowing they’ll die.
- As soon as the battle ends, use the Gift of Flame to torch the Graveyard from a safe distance.
- You’ve now gained some Valour for the zombies you killed, without providing a new graveyard full of Orcish bodies right next to you.
Again, this is pretty marginal, but it can make a huge difference when you can pull it off.
- Cost: 175 Gold
- Total Strength: 60
- Speed: 4 Hours/League by Road
- Ability: The Gift of Flame: Burn a Graveyard within 1 League. Restores in 8 Hours. Costs 12 Mana.
Dragon Banner
All races have a Common Banner-type unit, but it’s particularly important for the Orcs since it allows you to deploy Generals directly into your armies. Keeping a Banner with your army means you never have to wait around for reinforcements; you can forge ahead and keep slaying those Zombos. Almost every Orc deck should contain a fair number of these.
- Cost: 150 Gold
- Total Strength: 120
- Speed: 4 Hours/League by Road
- Ability: Dragon Banner: You may deploy Orcs at the Dragon Banner.
Slavedriver
The Slavedriver is the Orcish counterpart to the Humans’ Marshal. He allows you to train Orcs (or Goblins or Trolls, but why would you want them? They’re weak and slow, respectively, and your army has room for neither of those things) for Mana instead of Gold. This can be hugely important on maps where you start far from the action and can’t quickly generate Valour with which to claim Goblin or Dwarf gold-slaves, or simply maps without those greedy little buggers at all!
Remember, as well, that you can Raise Slaves from a settlement you don’t actually own! They’ll simply appear as neutral defenders, and if you do ever claim the town, you’ll gain control of them.
- Cost: 175 Gold
- Total Strength: 150
- Speed: 4 Hours/League by Road
- Ability: Raise Slaves: While in any Orc, Goblin or Troll Settlement the Slavedriver can train a new Army without paying the normal gold price. Restores in 12 Hours. Costs 12 Mana.
25 Dragon Brigade
These guys are basically Wolfriders who have traded their signature speed for a powerful ranged attack. They’re only a touch more Gold than Orcish Swords, making them quite affordable for their power, but they’re harder to buff with Generals and they’re Mana-hungry. Nevertheless, these guys can do a heck of a lot of damage, especially if you have several groups of them and you pull the Fire + Merge trick a few times in a row. I typically save them for time-sensitive defensive maneuvers, since one stack can often hold a town on their own.
- Cost: 325 Gold
- Total Strength: 600
- Speed: 4 Hours/League by Road
- Ability: Fist of the Dragon: Range 1 Attack with X*12 Strength (300). Restores in 10 Hours. Costs 10 Mana.
- Strength Per Gold: 1.85
- Type: Orc Warrior
Dragon
You’ll probably never want a Dragon in your Deck since there’s little advantage over simply training one once you’ve got the Lair, but Dragons are the Orcs’ fastest, and final, warrior. With 3 Flying Speed, a thousand Strength, and a ranged attack nearly as strong, Dragons can do everything reasonably well: clear graves, protect settlements, and assist far-flung allies. Their Gold efficiency isn’t very good, but the free one you get at most Lairs usually pays back the up-front Valour cost right away.
- Cost: 1250 Gold
- Total Strength: 1000
- Speed: 3 Hours/League - Flying
- Ability: Flaming Breath: Range 1 Attack with X*750 Strength (750). Restores in 10 Hours. Costs 12 Mana.
- Strength Per Gold: 0.8
- Type: Dragon
Those Other Guys
Finally, there are a few cards that just don’t often see play, or are so situational that they’re usually limited to single player games.
Unusual Picks
- The Elder Shaman is the most specialized card the Orcs have. The Elder Shaman can, for four Mana, burn every civilian in the settlement he’s at (for no gain). Obviously, this is only useful if you are definitely going to lose the settlement and have no other way of dealing with the resulting graveyard. I only start considering this guy in Nightmare games where a scorched-earth policy looks prudent and I don’t expect to have the Mana to use a Shaman Priestess instead.
- Dragon Rider is basically a stronger, faster, cooler Dragon with an even better attack. However, by the time you can play him, you probably already have a few regular Dragons on the field, thus relegating the mighty Dragon Rider to “win more” status, and making him a dead card the rest of the time.
Stages of Warfare
The Orcs are not what you would call a “finesse race”. However, playing them well does require good planning. As the war progresses, your priorities must shift. Additionally, Nightmare difficulty is often a totally different beast, so we’ll tackle that separately.
"Hard" and Easier
Early On
As with any race, the very early game is all about resource growth and damage control. Your top priorities in the early game look something like this, more-or-less in this order:
- Send Wolfpup Handlers to Mana Pools and Wolfriders or Chariots to any border towns that they can reach in time to save. Send Dragon Banners to the front lines as well.
- Claim at least one Orcish border town for deploying Heroes.
- Claim as many Goblin or Dwarven towns as possible, prioritizing those near the front lines. These will be your gold farms, because Orcish towns generate very little gold–especially since you’ll be militarizing much of your population.
- Claim at most one settlement near your starting position, ideally a Fortress with a unit of Swords on it, on your way to the front. Don’t waste time claiming settlements that are far from the action.
- Fear Nothing. Don’t be shy about taking fights that you can barely win. You have plenty more civilians to turn into warriors, and you need all the Valour you can possibly get right now. Fight all the time.
- Deploy a Shaman Priestess and send her towards the most dangerous Graveyards nearby (Orc Fortresses, Dragon graves, etc.).
The Height of Conflict
The midgame is when you’ve finished the first round of damage control. You’ve likely beaten the first large threat headed your way, possibly with massive casualties. You’re gathering strength for confrontations with the largest groups of Zombies, picking up the towns you skipped in the early game, and pumping out two to three hundred warriors a day. Your priorities here are pretty simple:
- Group your Wolfpup Handlers with your Wolfriders and Chariots, and send them out as their own high-speed army if they were part of your main force before.
- Keep a Shaman Priestess near each main army. Keep the main armies moving on roads as much as possible, fighting everything, while the Priestesses follow behind, burning hard-to-reach graveyards.
- Continuously reinforce your “slow” armies by delploying Generals and Swords to their Dragon Banners.
- When you have Wolves in hand, pick further-away or inconvenient targets, then deploy one to three cards as necessary along a path to that target. Group them up at the far reaches of your empire, and go burn graves or defend Mana Pools.
- Make sure to merge any units with Combat Experience with newer troops to maximize their power!
Cleanup in Aisle Z
By the time the endgame rolls around, there’s probably only one real threat left in your region, and it’s likely no match whatsoever for your armies. This is where I typically merge everyone together and then go nuts with Scarface Lords, and stomp the rotting guts out of the last pitiful stacks while my Dragons clean up any stragglers. Priorities:
- Crush face with the biggest armies you can possibly raise.
- Have fun.
This guide continues below!
32000 characters isn’t enough…

 ) and you can instantly buff a cavalry unit you summon with a handler without having to wait to merge them for a couple of hours.